This super cute felt rainbow purse tutorial is a guest post from the lovely ladies over at Little Button Diaries, Laura and Tia. We were both finalists in the craft category of some blog awards in the UK a few times and got chatting when we were sat on the same table, I wish I lived closer to them actually as we get on so well and it would be lovely to meet up and talk about all things crafty!
They have all kinds of wonderful craft projects over on their blog but sewing is one of the areas they focus on a lot, and it’s one of the areas that I’m not very skilled in so they have put together this simple tutorial for me to share with you all.
Anyway I will hand you over to them…
Easy Rainbow Purse
Oh hello! We’re Laura & Tia from Little Button Diaries, a crafty blog where we write about the things we make and bake for us and our kids. We met the lovely Jess a few years ago at the MAD Blog Awards and are thrilled to be doing a craft swap with her!
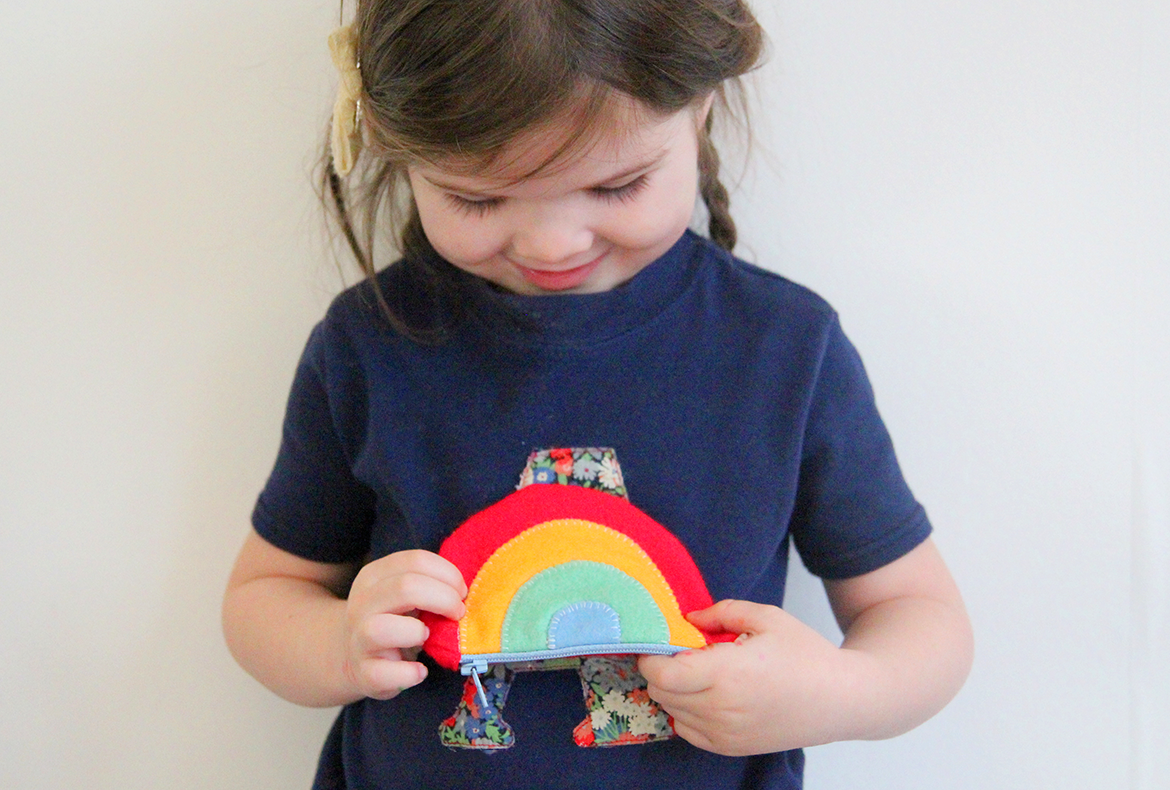
So we thought we would make a little colourful purse for our littlens as they love nothing better than to play shops (meets vet/hairdressers/cafe…). It’s really easy to make with just a zip and some felt. We love felt – you don’t have the finish the edges, it’s inexpensive and nice and bright. We used a sewing machine but you could easily sew these by hand if you like – it will just take you a bit longer.
You will need:
– 1 x 10cm zip
– Red, yellow, green and blue felt
– White thread
HERE IS THE RAINBOW PURSE TEMPLATE
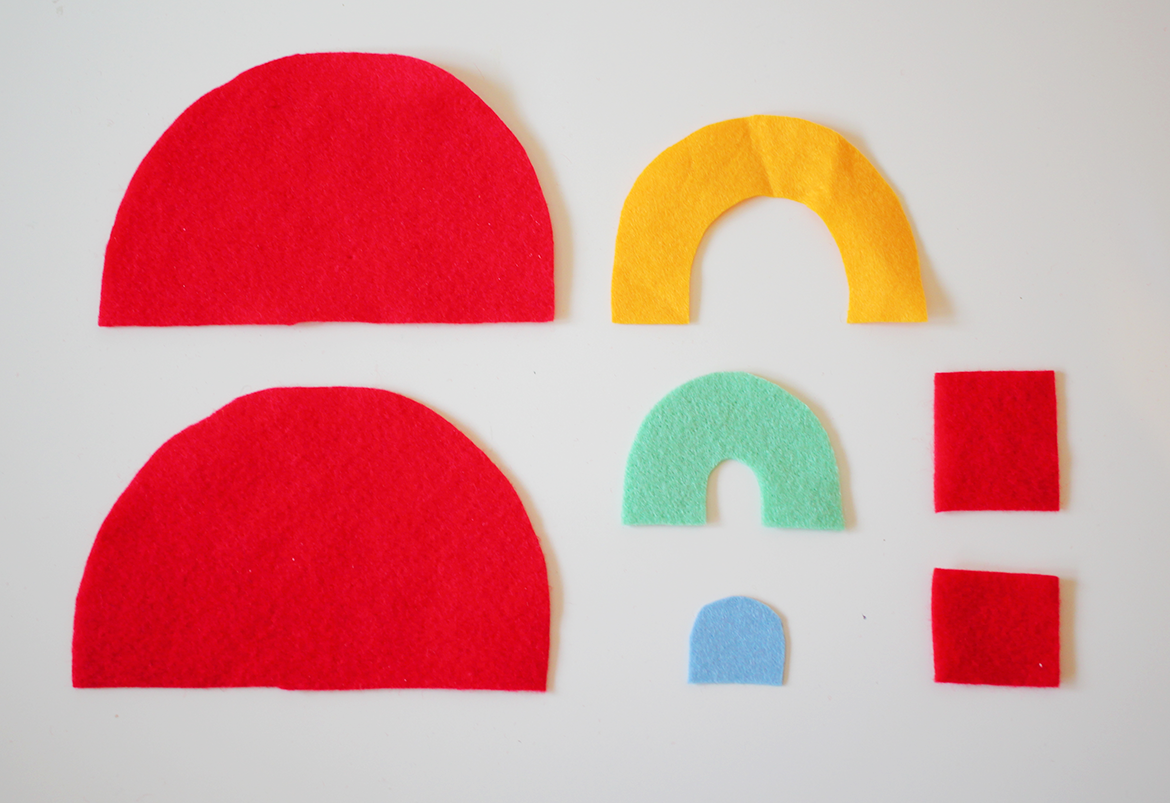
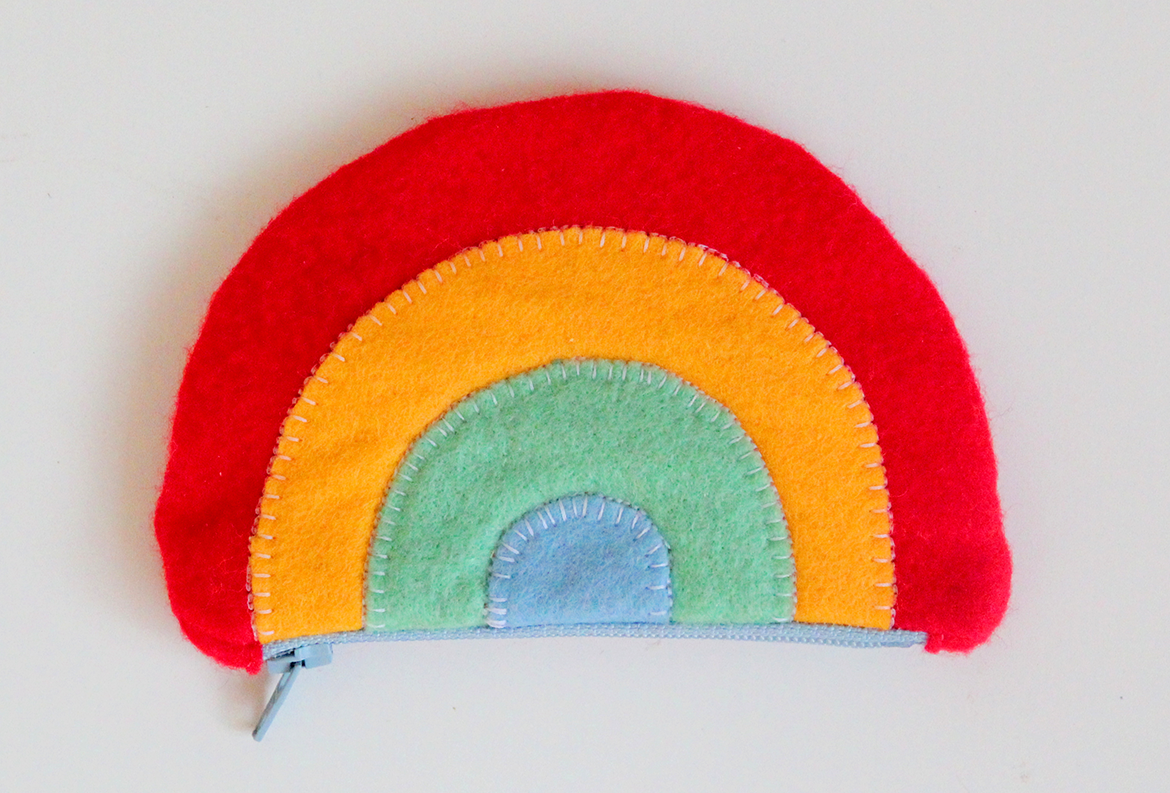
- Begin by cutting the felt pieces using the templates. Cut 2 semicircles and 2 squares from the red felt, then arcs of yellow, green and blue.
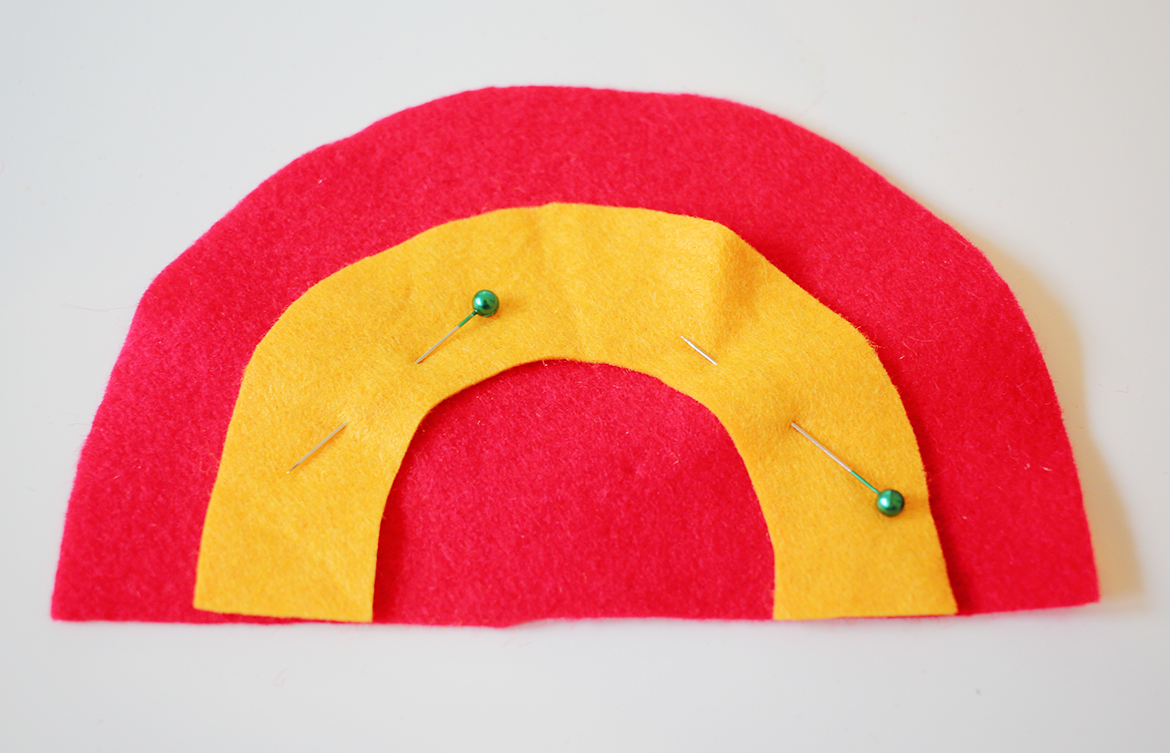
- Pin the yellow arc onto one of the red semicircles so that the straight edges are lined up. Sew around the top of the arc, close to the edge. We used blanket stitch but a straight stitch would be fine too.

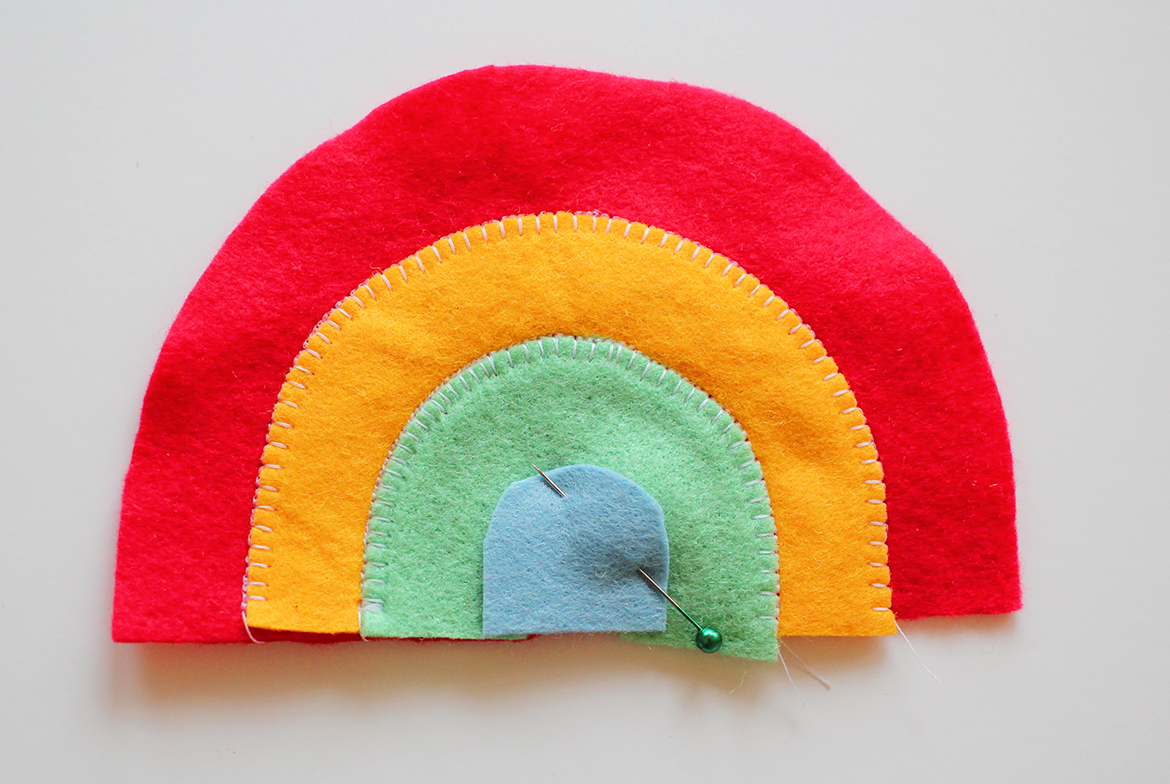
3. Repeat for green felt, then for the blue felt – lining up the edges each time.

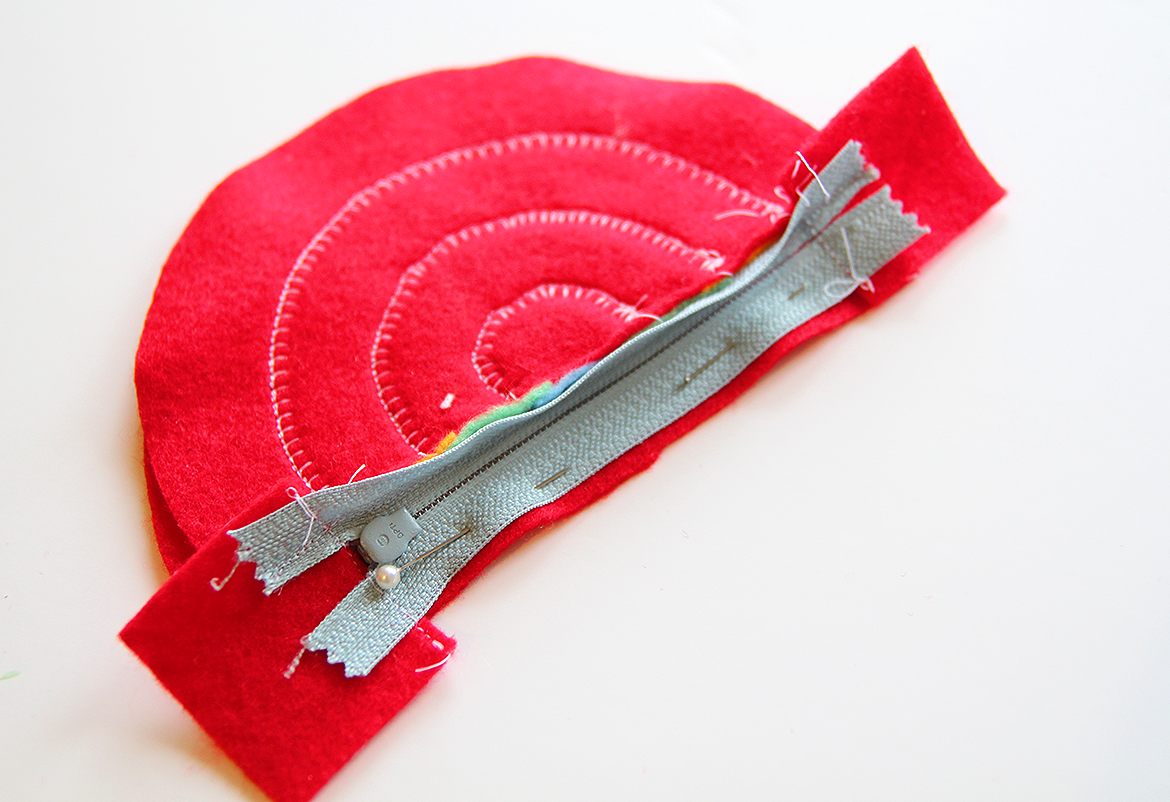
- Pin the red squares onto the ends of the zip and sew in place to cover each end.
 5. Now pin the zip on to the rainbow felt, right sides together, with the edges lined up. Put the zipper foot on the machine and sew all along the zip, nice and close. When you get near to the zipper you will need to lift the foot and pull it out of the way.


6. Place the rainbow and zip piece face down on top of the other red semicircle and line the edges of the zip with the felt. Pin and sew.

7. Open up the zip (that bit is important!) and pin the purse all the way round and sew, 5mm in from the edge, all the way round.

8. Trim away as much of the excess zip as you can and turn out the purse through the zip, pressing it out as you go.


That’s it, you’re all done! If you fancy seeing our others crafts and whatnots then hop on over Little Button Diaries. You can also come say hi to us on Facebook, Twitter, Instagram and Pinterest. Happy Crafting everyone!
Tia & Laura x